How to Draw Vines With Flowers
Vines are some of the strangest and most complex plants you can find.
This twisty plant species can be seen snaking up any surface or object, and this can result in some truly beautiful and interesting structures.
This complexity can also make it difficult to learn how to draw vines, however, which can lead to difficulties and frustration.
With the right guide, it doesn't have to be frustrating, however! Luckily, that very guide happens to be in front of you now.
This step-by-step guide on how to draw vines will show you how easy and fun it can be to draw these amazing plants.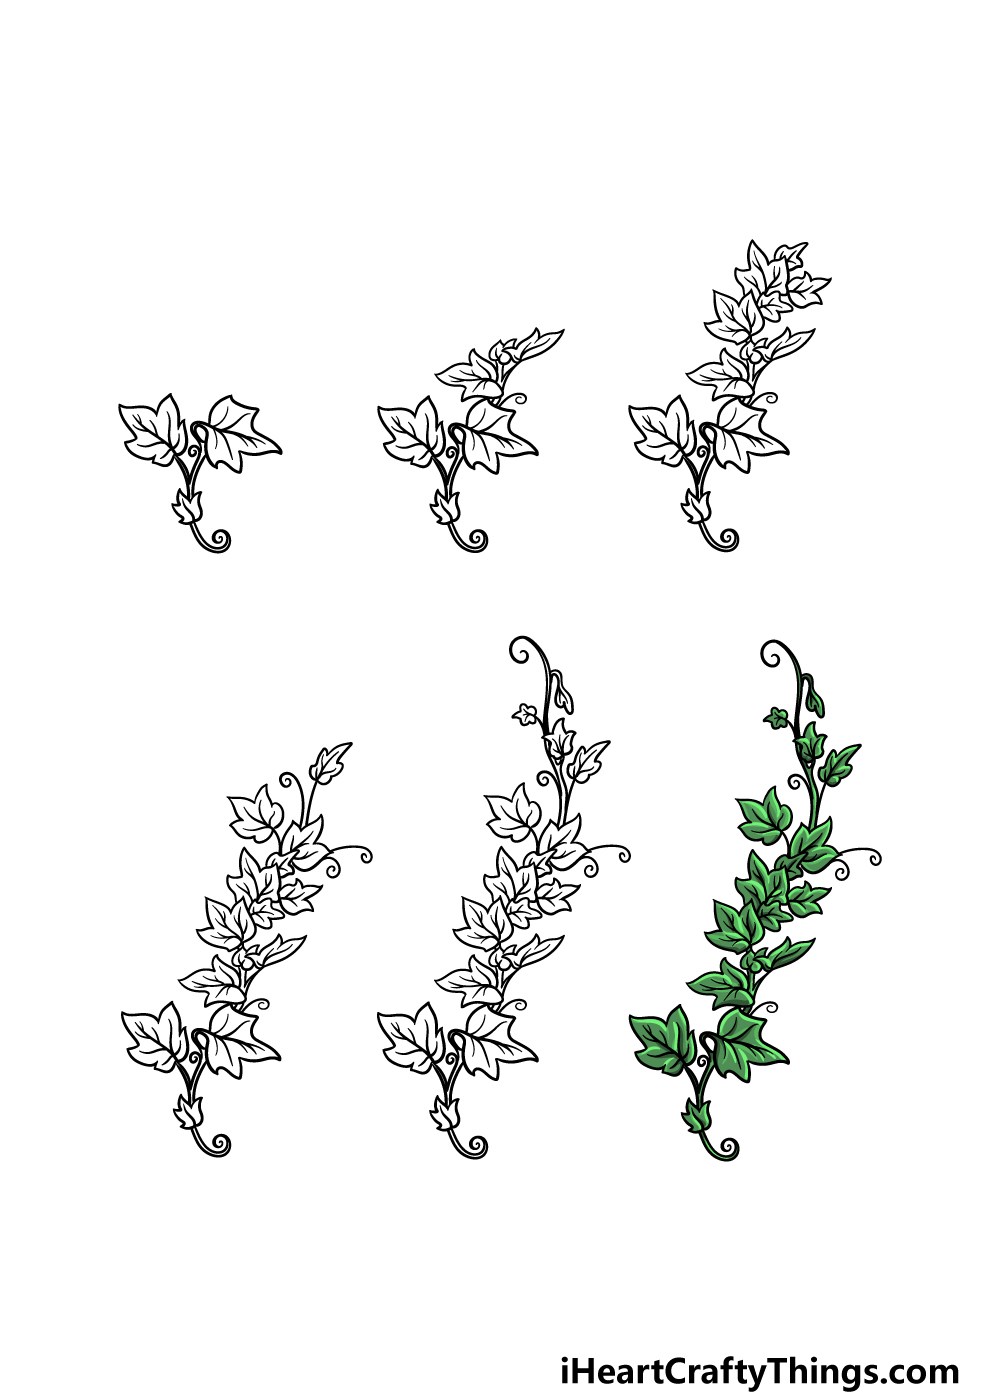
What's in this Blog Post
- How to Draw Vines – Let's Get Started!
- Step 1
- Step 2 – Next, draw some more leaves
- Step 3 – Draw another clump of leaves
- Step 4 – Now, draw some more leaves and vines
- Step 5 – Finish off the final details and touches of your vines drawing
- Step 6 – Finish off your vines drawing with some color
- 5 Tips To Make Your Vines Drawing Even Better!
- Your Vines Drawing is Complete!
How to Draw Vines – Let's Get Started!
Step 1
The trick to drawing a tricky plant such as vines is to take it slowly, start small and then build up from that.
We will be doing exactly that in this step of our guide on how to draw vines. To begin this drawing, you can start with two leaves close to one another.
The leaves will be fairly small and quite pointy. They will also have some pointy lines inside of them for the veins, and this will make them look even more realistic.
Once these two leaves are drawn, we can start to add the vines that they're attached to.
These fines will be drawn with some thin lines close together, and near the base of the drawing there will be another small leaf. Then, finish off with a twisty vine coming down from the bottom of it.
With this step complete, you're ready for step 2!
Step 2 – Next, draw some more leaves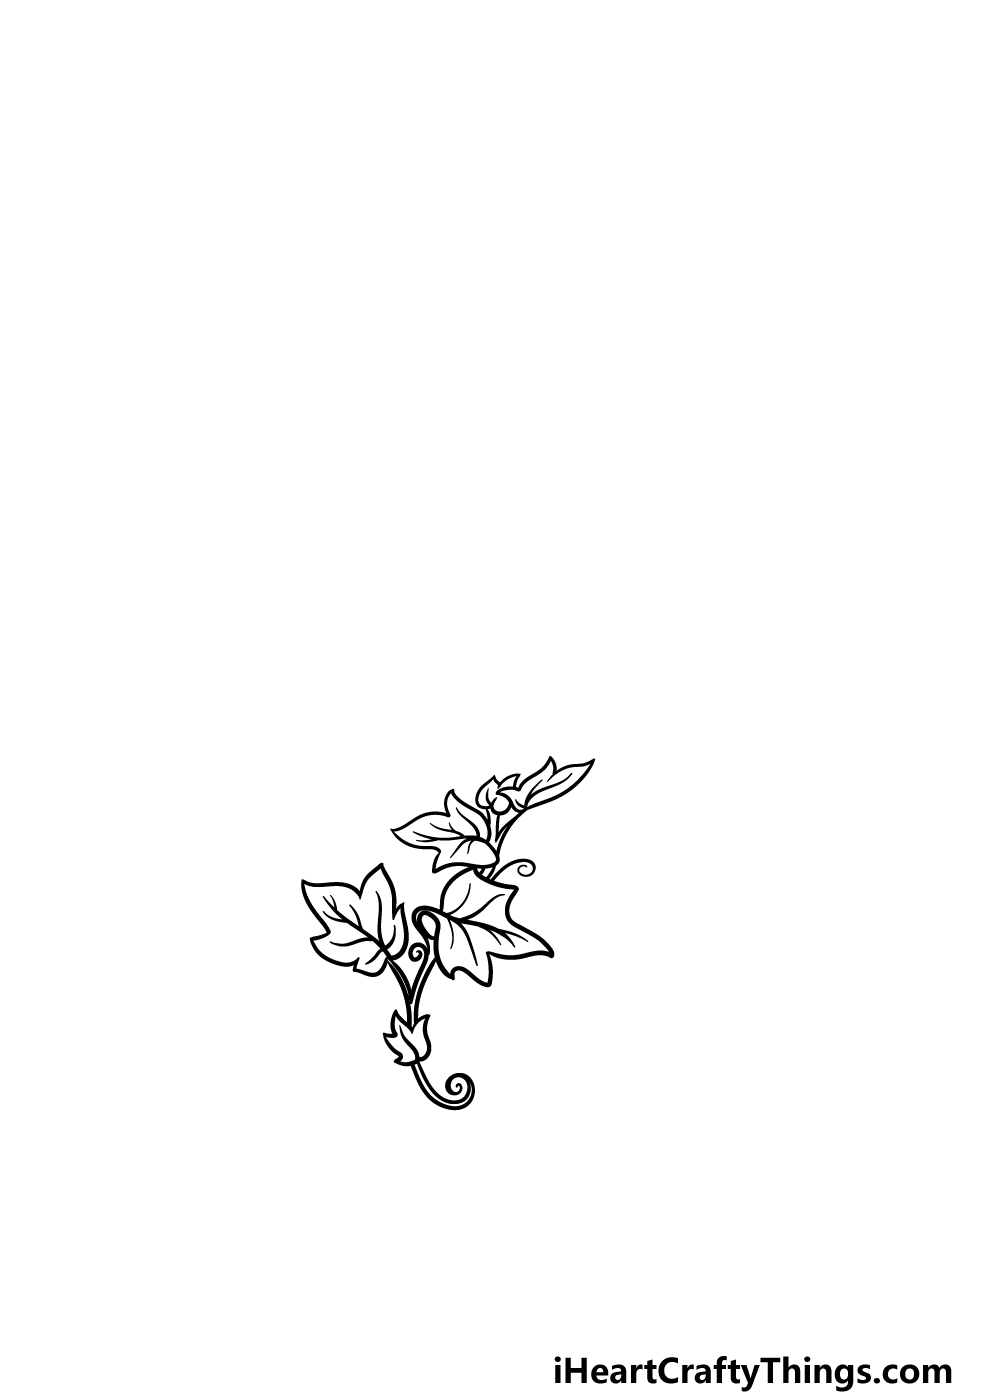
To continue building on to your vines drawing, we will be adding some more leaves onto it.
These leaves will be smaller than the two main ones that you drew in part 1, and because they are at different angles they will be shaped differently too. The leaves will also have the same veiny pattern inside of them, however.
They will also be attached to the central vine stem that the other ones were coming from, and once it looks like our reference image we can go on to the next part.
Step 3 – Draw another clump of leaves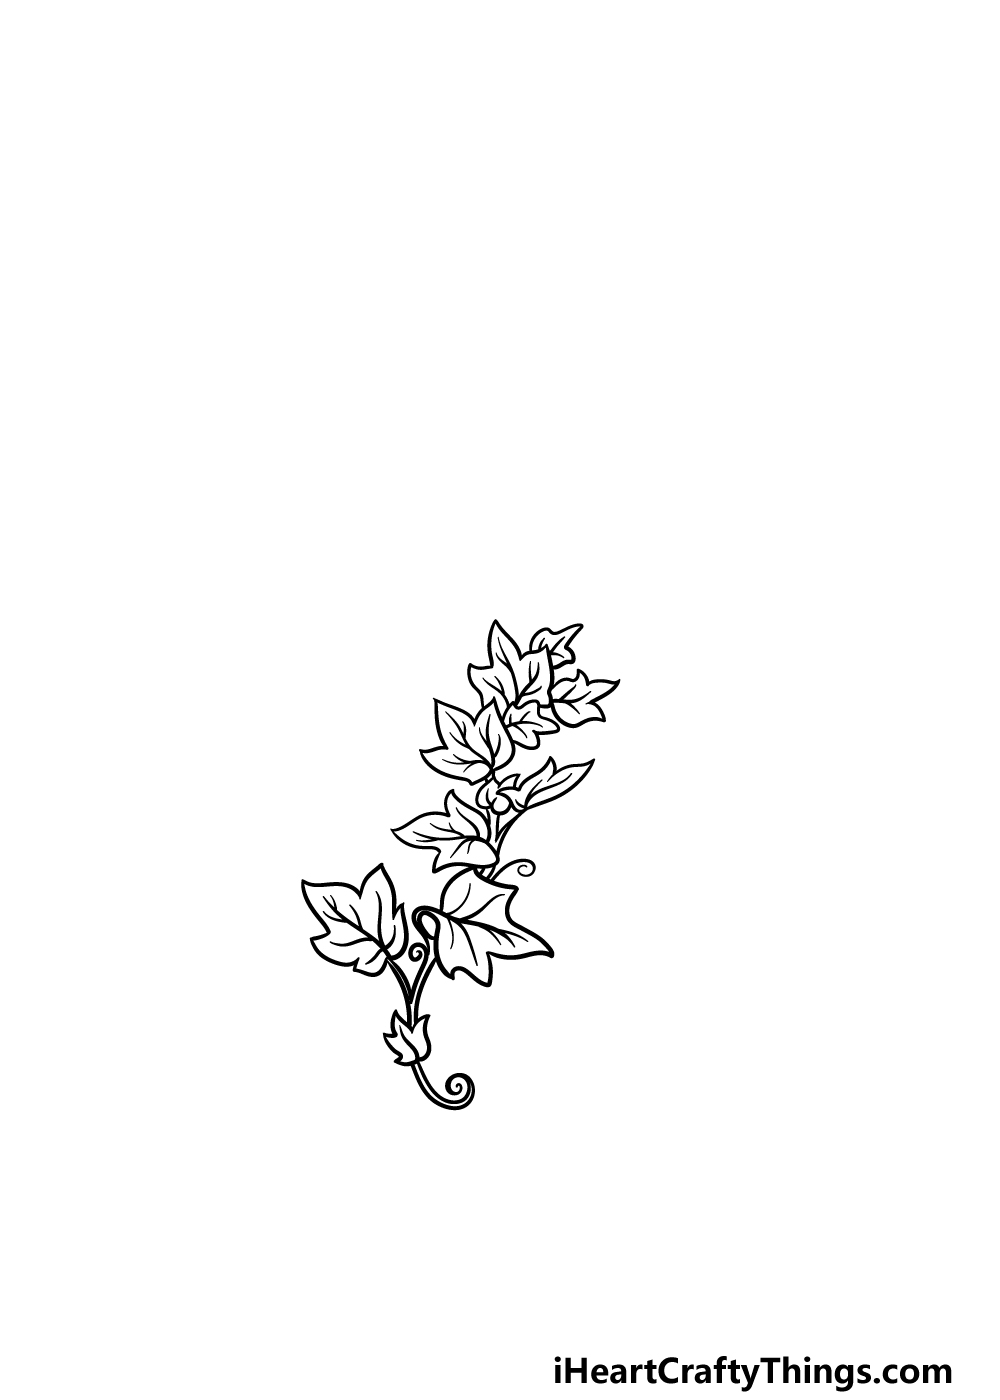
For this third step of our guide on how to draw vines, we will be adding another clump of leaves.
The size of these leaves will vary between small and large ones, but otherwise they will look very similar to the other ones that you drew.
They'll have the same amount of points on them with the veiny details on the interior.
For this step, you can add around 5 leaves if you would like it to look like our reference image, but you could add a few more or a few less depending on your own preference!
Step 4 – Now, draw some more leaves and vines
We shall add some more leaves and vines to your vines drawing in this fourth part. Start this part by drawing three more leaves, two of which will be connected to thick lines.
Then, once you have these leaves drawn we will add some curved lines coming out from this clump, and these lines will curl into a loose spiral at the end.
With this step complete, we can then add some final details in the next step to get you ready for some amazing colors!
Step 5 – Finish off the final details and touches of your vines drawing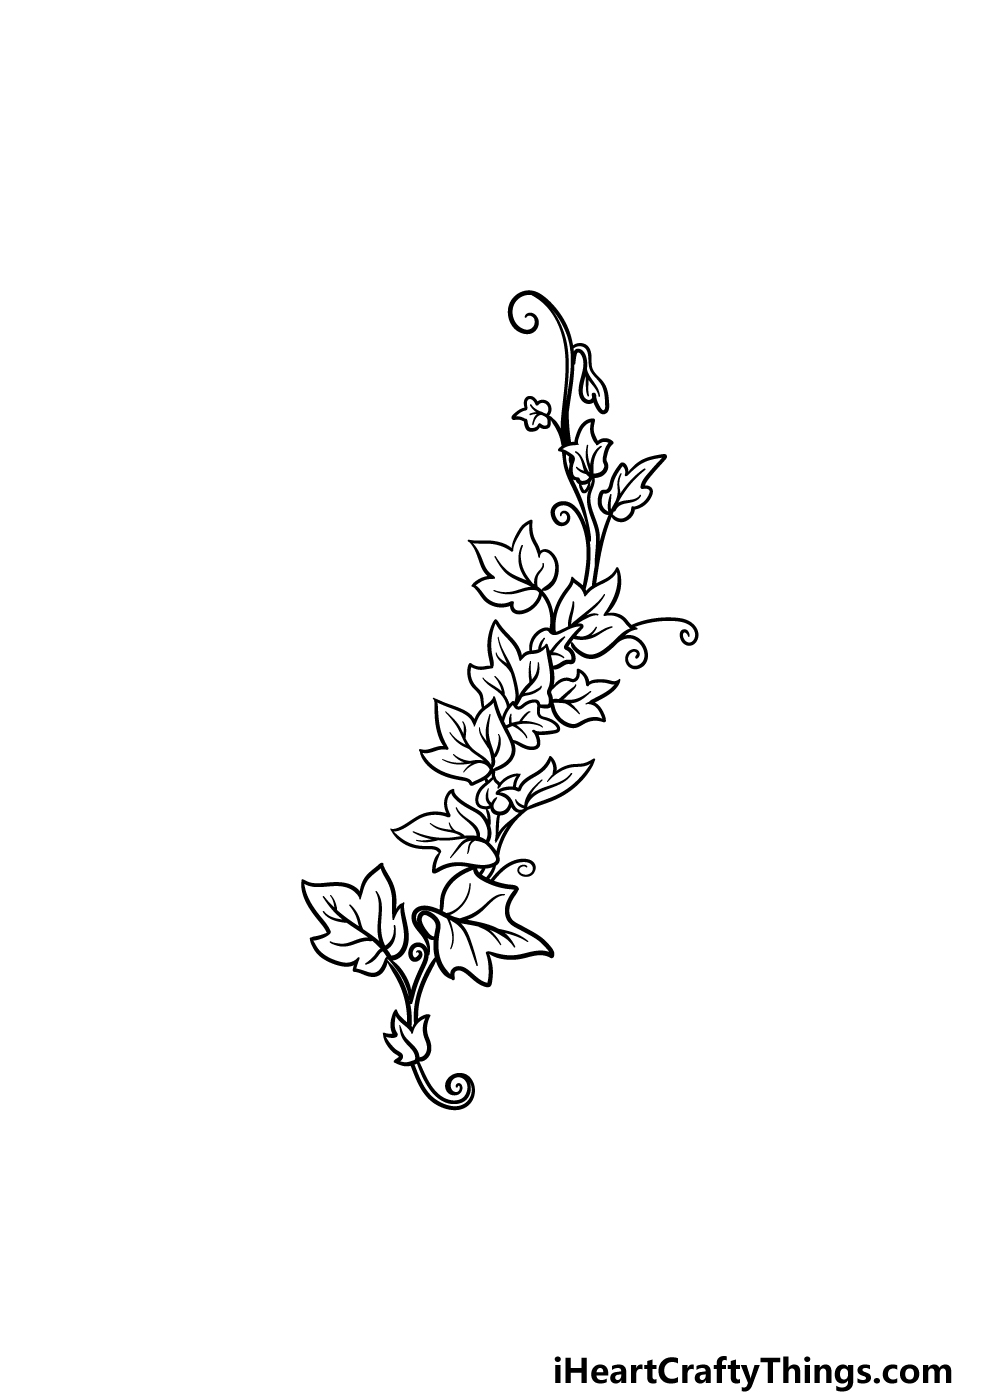
The fifth step of this guide on how to draw vines will see you adding the final parts, details and elements to finish it off nicely.
First, draw a thick vine stem emerging and twisting out of the top of the drawing.
We will be attaching a few small leaves onto this vine, and additionally there will also be some more of those twisty, spiraling lines coming off of it.
That will finish off all of the details in this guide, but be sure to add some of your own to really bring it to life!
Vines will often grow and twist up on other plants, trees and garden structures, so you could draw something like that for the vines to be climbing something.
You could also draw a cool background for the picture, and this would be a great chance to create a wonderful garden scene with more of your favorite plants and flowers.
These are just a few ideas, but what else can you think of to finish off this vines drawing?
Step 6 – Finish off your vines drawing with some color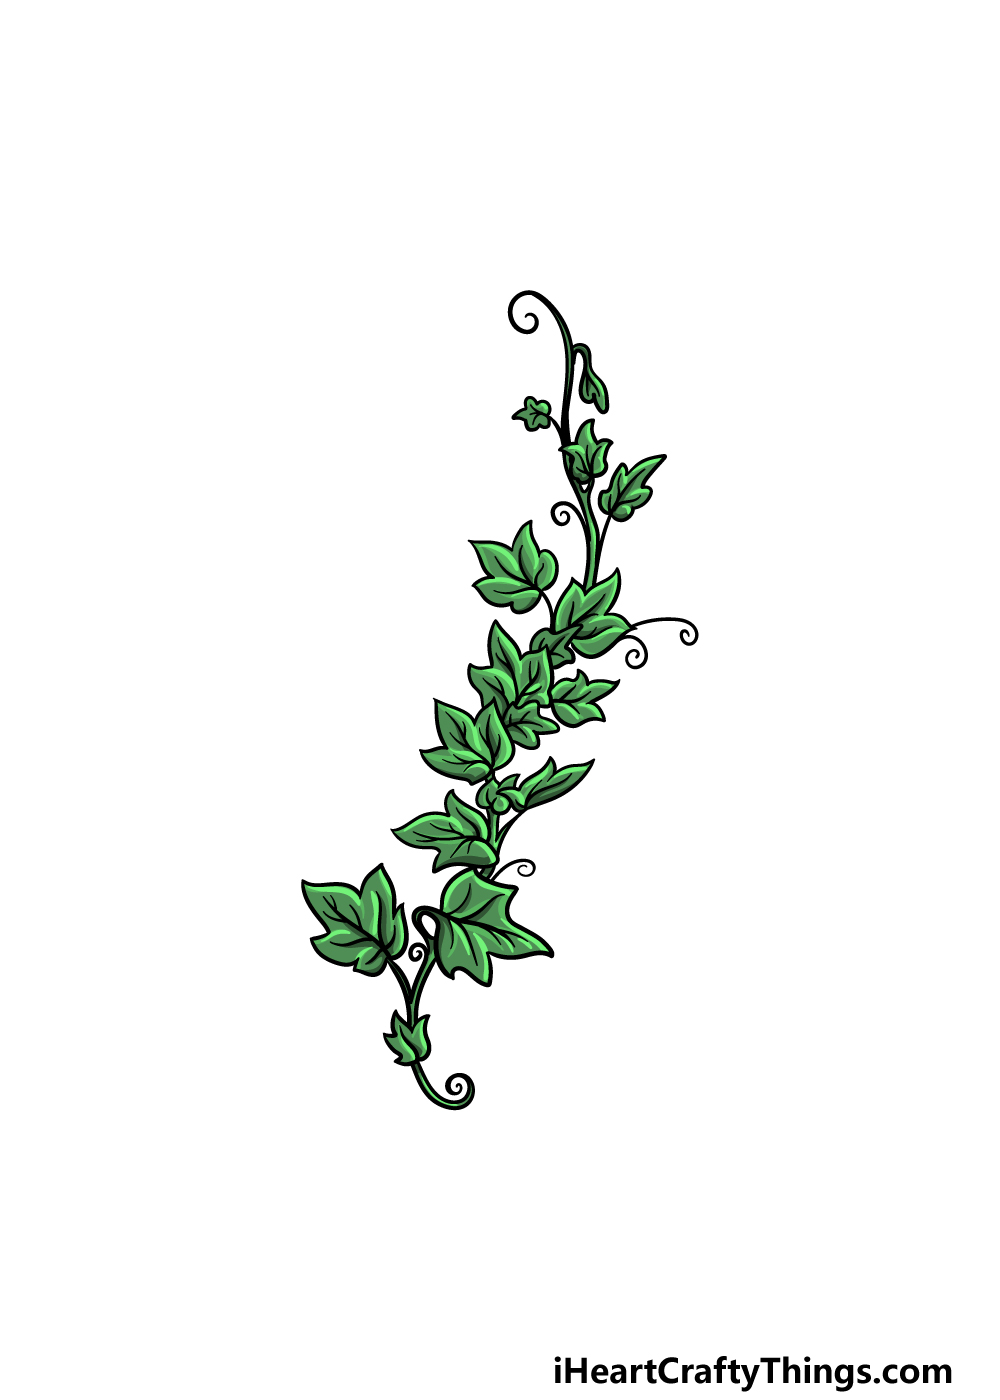
This is the final step of your vines drawing, and for this one you can bring it to life with some incredible colors!
For our reference image, we went with various shades of green for the vines, but you don't have to go with these exact colors!
You could try some different shades or even go for a completely different color scheme if you prefer. If you drew any background details or additions, then this is a great chance to color those in as well.
Once you have chosen your colors, you can then have some fun choosing which art mediums you will use to finish off this vines drawing.
Whether you use paint mediums such as watercolors and acrylics or more precise mediums like colored pens and pencils, there are many options for coloring in this awesome picture!
5 Tips To Make Your Vines Drawing Even Better!
This vines sketch looks amazing but you can make it even better with these tips.
Vines can get out of control fast as they grow all over the place. This can be a nightmare for your garden, but it could look great for this vines drawing!
Now that you know how to draw these vines, you could surround it with many more vines. These could be extending down from the existing vines, include vines surrounding this one or both.
If you have lots of patience, you could fill the page with these vines!
This next tip we have for your vines sketch leads on from the previous one. Vines can be found in the strangest of places, so we think it would look great to add a background for this page.
There are so many options you could add these vines to, so what kinds of settings can you think of?
Another way to make this drawing of vines even better would be by adding some extra details and elements. For example, many vines will have pretty flowers growing on and around them.
You could make up your own flowers or use a favorite kind for this idea. Or, you could look up some pictures of real vines and use those to help you with this picture.
Vines will sometimes be incorporated into some interesting designs, and you could do the same thing. For example, you could use these vines to form a pattern that incorporates other pictures and elements.
You could even take it a step further by making some words out of the twisting vines! There are so many creative ways you could use these vines, so what are some ideas you have?
We think that to finish off this vines drawing you should really go wild with your favorite colors! We went with realistic green for these ones, but you could use any other colors you like.
When coloring, we would suggest using mediums like colored pens and pencils to give you more control as you color.
Your Vines Drawing is Complete!
This is the end of this guide on how to draw vines, and reaching this point is something you should be proud of!
Vines aren't always the easiest thing to draw properly, so we aimed to break it down into smaller steps so that it would be easy and fun for you to do.
Now you can take it even further with your own details, elements and additions. We went through a few ideas that you could try such as drawing a background or more plants and flowers, but this is your chance to show off your creativity!
Once you have finished this guide, be sure to visit our website for more amazing drawing guides. We have plenty of incredible tutorials, and we upload the collection often.
We hope you will share your completed vines drawing on our Facebook and Pinterest pages for us to admire! It would be great to see the creativity you brought to this picture.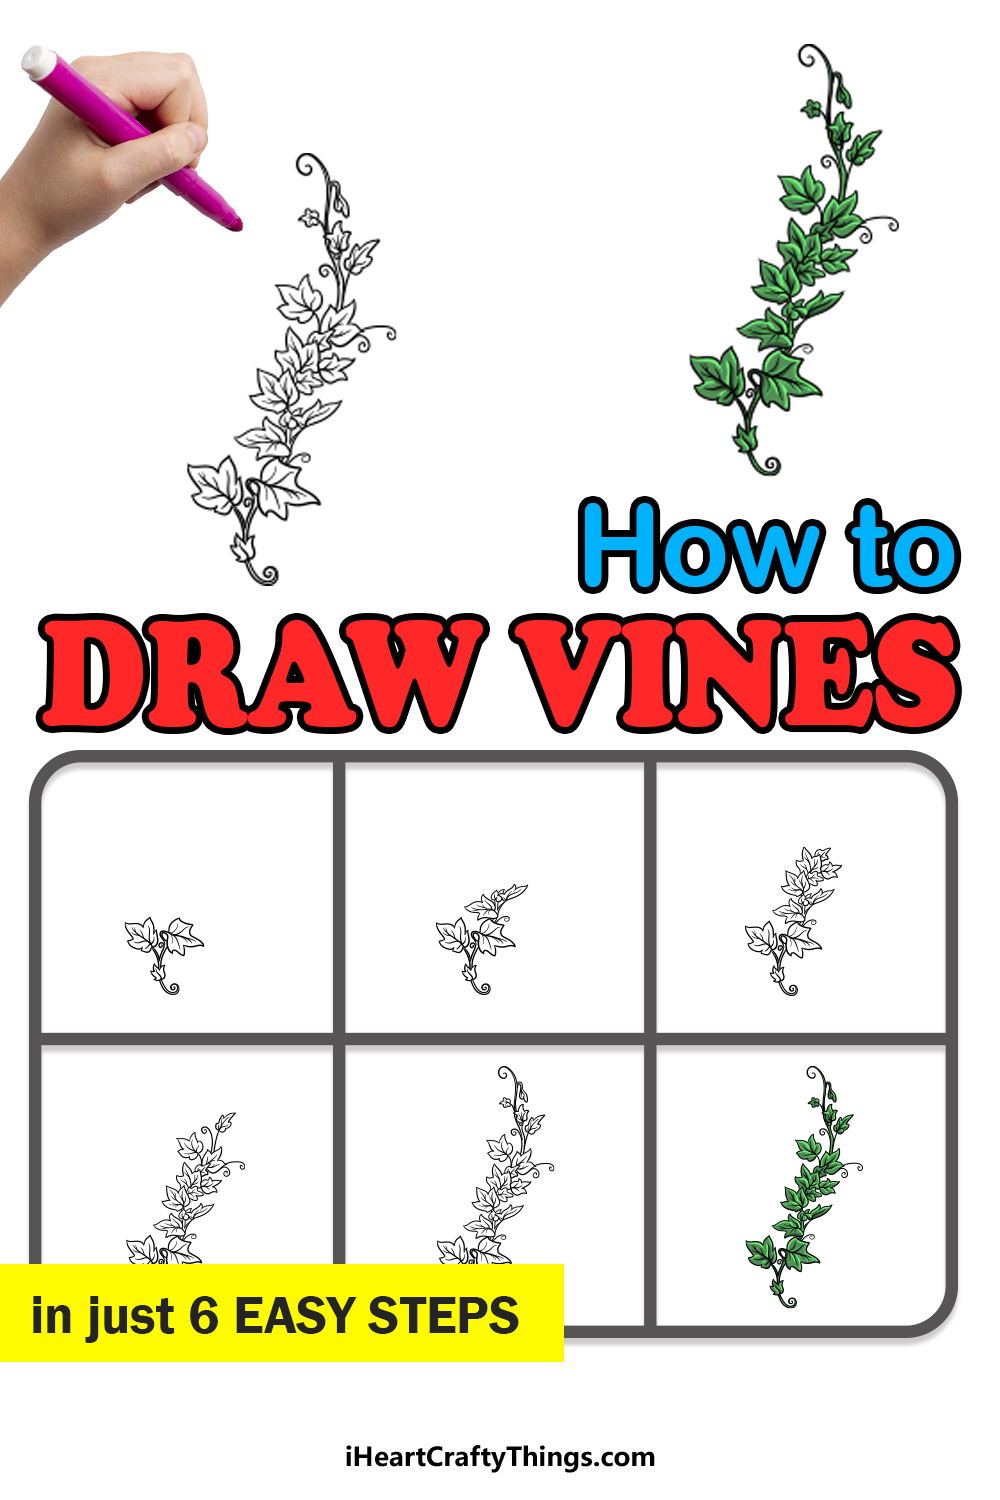
Source: https://iheartcraftythings.com/vines-drawing.html
0 Response to "How to Draw Vines With Flowers"
Post a Comment